Operating a small spindle core drilling rig—such as the industry-leading—requires more than just following basic steps: it demands precision, adherence to geological best practices, and strict safety protocols. Many drilling operators face common pain points: low efficiency from improper tool selection, equipment breakdowns due to poor maintenance, or safety hazards from incorrect startup/shutdown sequences.
Equipment Installation and Commissioning: Lay the Foundation for Success
Proper installation and commissioning are critical to avoiding costly downtime later. Rushing this phase often leads to misalignment, hydraulic leaks, or unstable drilling—all of which harm efficiency and safety.
Site Preparation
- Location Requirements: Select a flat, compacted surface with no loose soil or debris. Maintain a minimum 10-meter safe distance from high-voltage lines to eliminate electrical hazards, and ensure clear access for tool transport and emergency response.
- Foundation Specifications:
- Heavy models: Use a C25 concrete foundationwith pre-embedded M24 anchor bolts. Flatness tolerance must be ≤5 mm/m.
- Lightweight models : Wooden sleepers or steel support beams are sufficient—ensure supports are evenly spacedand anchored to the ground with steel stakes to prevent shifting.
Equipment Installation
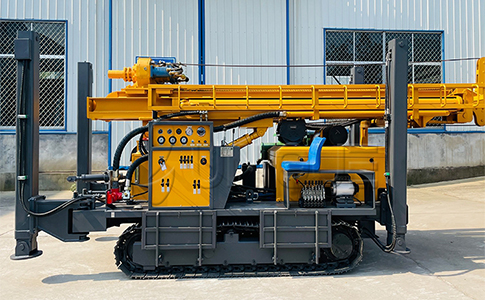
- Mainframe Positioning: For small spindle core drilling rig, use a 5-ton crane to lift the main unit . Level the frame using a precision spirit level and torque anchor bolts to 350 N·m with a torque wrench—over-tightening can crack the frame, while under-tightening causes vibration.
- Power Connection: Connect the motor or diesel engine to the transfer case via V-belts. Adjust belt sag to 15–20 mm and align pulleys to within ≤2mm to prevent uneven wear.
- Hydraulic System Setup: Fill the reservoir with ISO VG 46 anti-wear hydraulic oil. Install a 20 μm high-pressure filter and inspect all hydraulic hoses for leaks using soapy water—bubbles indicate loose fittings.
No-Load Commissioning
Run the power unit for 5 minutes at idle to purge air from the hydraulic system. During testing, verify:
- System pressure: 15–20 MPa or 18–25 MPa ,check via the pressure gauge on the control panel.
- Spindle smoothness: No abnormal noise or jitter when rotating at 50–100 rpm.
- Winch braking: Braking distance ≤10cm when lowering a 50kg load—adjust brake pads if needed.
Pre-Drilling Preparation: Tailor to Geological Conditions
Success depends on matching tools and materials to the formation. Skipping this step leads to bit damage, hole collapse, or poor core sample quality.
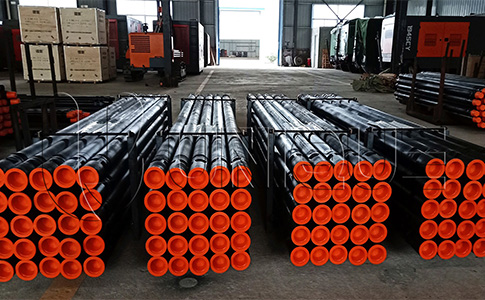
Drill Tool Selection
Choose tools based on formation type:
- Unconsolidated formations : Φ91 mm tungsten carbide scraper bit + Φ73 mm seamless steel drill pipe for stability.
- Bedrock formations: Φ75 mm diamond core bit for hard rock, or Φ91 mm carbide insert bit for medium-hard rock.
- Critical Tips: Clean threads with a wire brush to remove rust/debris, apply high-temperature thread oil, and tighten to 250 N·m with a torque wrench—loose threads cause pipe stripping.
Mud Preparation
Mud acts as a lubricant, coolant, and hole stabilizer. Customize the formula:
- Clay formations: Sodium bentonite slurry — mix 20kg bentonite per 100L water, stir for 30 minutes to avoid sedimentation.
- Sandy formations: Add 0.1% anionic polyacrylamide to bentonite slurry to flocculate sand particles and prevent hole collapse.
- Hard rock drilling: Add 5–8% diesel to the mud to reduce friction and extend bit life.
Pre-Operation System Inspection
Conduct a 10-minute checklist to avoid mid-drilling failures:
- Mechanical components: Gear clearance,chuck clamping force , and wire rope condition (no fraying or broken strands—replace if wear exceeds 10%).
- Hydraulic system: Oil level , leak points, and pressure gauge accuracy.
- Electrical system: Insulation resistance, emergency stop button functionality, and grounding continuity.

Drilling Operation Procedure: Step-by-Step Execution
Follow this sequence to ensure precision, safety, and high-quality core samples.
Hole Opening
- Start with low speedand light feed pressure to avoid bit damage.
- Use a Φ110 mm guide bit for the first 1m to establish verticality—remove the guide bit once the hole is stable.
- After drilling 5m:
- Inspect bit wear.
- Adjust mud density to 1.15 g/cm³ to enhance hole stability.
- Measure vertical deviation with an inclinometer.
- Stop the clutch → release the chuck → raise the spindle 500mm → re-tighten the chuck → resume drilling.
- Rod changes: Use pipe clamps to secure the drill pipe during disassembly—this prevents thread stripping .
Finishing and Hole Cleaning
Once target depth is reached:
- Run dry drilling for 5 minutes, then circulate mud for 15–20 minutes to flush out sediment.
- Measure hole diameter with a caliper.
- Extract core samples carefully using a core lifter—store samples in labeled containers to maintain geological integrity.
Key Safety Protocols: Non-Negotiable Standards
Safety is non-negotiable in drilling operations. Non-compliance leads to injuries, equipment damage, or project shutdowns.
Startup/Shutdown Sequences
- Startup: Mud pump → rotary system→ feed handle. Never start the rotary system first—insufficient lubrication causes bit overheating.
- Shutdown: Feed handle → rotary system → mud pump. Allow the motor to idle for 2 minutes before cutting power to cool components.
Personal Protective Equipment
Mandatory for all operators:
- Hard hat to protect against falling debris.
- Safety glasses to shield eyes from mud and rock particles.
- Cut-resistant glovesfor handling drill pipes with sharp threads.
- Safety harness.
Emergency Response
- Hole collapse: Immediately lower the drill pipe to block the hole, cut power, and inject cement-sand grout to reinforce—resume drilling only after 24-hour curing.
- Electrical faults: Press the emergency stop button, disconnect power, and inspect wiring.
- Hydraulic leaks: Shut down the system, relieve pressure, and replace damaged hoses—avoid contact with hot oil.
Maintenance and Storage: Extend Rig Lifespan
Regular maintenance reduces repair costs by 40% and extends machine lifespan by 3–5 years.
Daily Maintenance
- Clean drill surfaces with a high-pressure water gun.
- Check all bolts for tightness—re-torque if loose.
- Refill hydraulic oiland grease moving parts with lithium-based grease.
- Clean the return oil filter.
Regular Maintenance
- Weekly: Adjust clutch clearance , inspect winch brakes, and lubricate the drill mast’s telescopic sections.
- Monthly: Drain and replace hydraulic oil, clean the reservoir tank , and test electrical insulation resistance.
- Quarterly: Inspect drill pipe threads and calibrate pressure gauges and inclinometers.
Long-Term Storage
- Drain all hydraulic oil and mud pump water to prevent freezing or corrosion.
- Apply anti-rust oil to metal surfaces.
- Loosen V-belts and steel cables to relieve tension.
- Store the rig in a dry, ventilated warehouse—cover with a waterproof, UV-resistant tarp to avoid moisture damage.
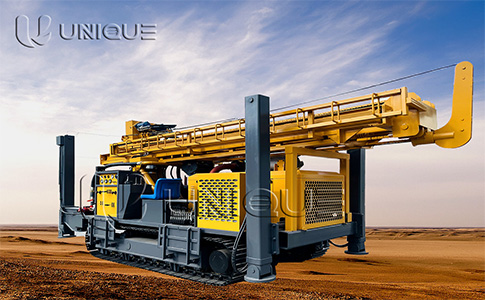
Special Working Conditions: Adapt to Challenges
Small vertical-spindle core rigs excel in versatile conditions—use these tips to adapt:
Adjust the mast angle between 65°–90°. For angles ≤75°, install a drill pipe stabilizer to reduce deviation to ≤1.5°/100m.
Fault or Fractured Zones
Pre-grout the area with cement-sand grout to reinforce loose rock. Cure for 48 hours, then drill with a Φ89 mm bit to avoid jamming.
Deepwater Drilling
Position the rig on a floating platform. Keep the drill pipe 1–2m above the water surface to prevent water intrusion, and increase mud density to 1.2 g/cm³ to counteract water pressure.
Upgrade to a high-altitude diesel engine to compensate for reduced oxygen. Use low-viscosity hydraulic oil to improve fluidity in cold temperatures.
Conclusion: Master Small Core Drill Operation for Optimal Results
Operating a small vertical-spindle core drilling rig effectively requires a blend of technical precision, geological awareness, and proactive maintenance. By following this step-by-step guide, you’ll minimize downtime, reduce equipment wear, and consistently deliver high-quality core samples—whether drilling in clay, bedrock, or challenging environments like fractured zones or deepwater.
For more personalized support—such as custom tool recommendations for your geological conditions or maintenance training for your team—contact our technical experts. Invest in proper operation today to maximize your drilling rig’s performance and return on investment.